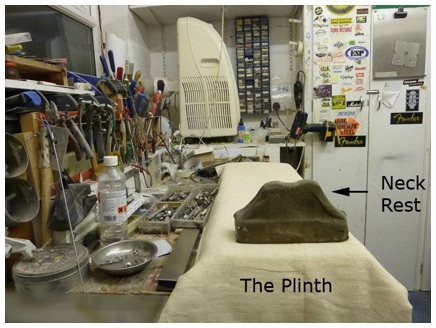
The most important thing when working on other peoples’ guitars is to give them due care. I have seen many ‘guitar techs’ use a piece of old carpet or felt on which they rest the guitar next to all their tools. In fact, carpet attracts all sorts of debris, just ready to scratch a guitar, and it is also very easy to accidentally damage a guitar with tools lying about on the same level.
I have devised a method of using folded twill sheet with a new clean side for each guitar - it’s surprising how many ‘sides’ you get out of 1 big sheet - and, in order to lift the guitar above the level of the tools, I use a ‘Plinth’ with a leather-covered neck rest to ensure the guitar is held in place without slipping off.


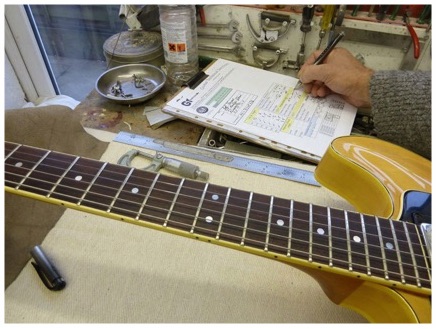
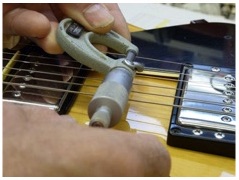


At the beginning of the set-up, I check the measurements on the instrument at the time it came to me.
The truss rod travel may be adjusted immediately, especially if the guitar neck is badly bent, but sometimes remedial straightening may be required
All details are recorded on my Worksheet/Invoice. This acts as a reference point for the action height and fret condition before work commences - in fact the final invoice clearly shows all the geometry of the guitar before and after the set-up.
After noting down the geometry the strings are removed and the truss rod is adjusted to create a straight fretboard.
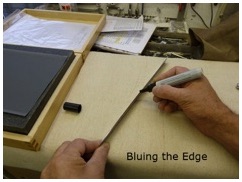
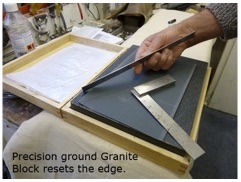
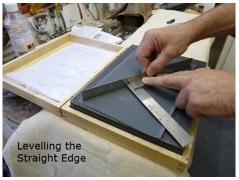
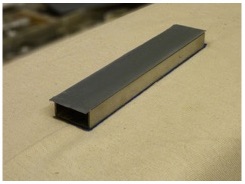
At this stage, I need to mention the tools I use. I strive for perfection and, to begin with, ensuring the ruler or ‘edge’ is level is paramount. Any old straight ruler or ‘edge’ may not be good enough for finding the true level of the frets and so I engineer my straight edges to make sure they are as near perfect as possible. In this way I am able to trust my tools and achieve consistently good results.
Often there are high areas of frets that require drastic treatment such a rough filing - removing the ‘high spots’ - before the precision levelling can begin.
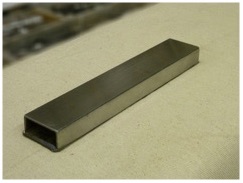
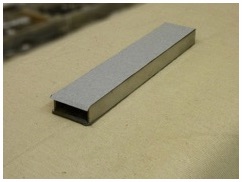
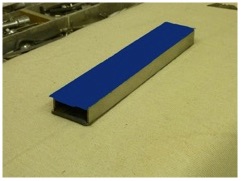
Just like Stewart MacDonald, I use steel box section that has been ground flat. As I understand it, Stu Mac only seem to grind the narrow surface area but my Toolroom chap tells me he achieved a level of 4/10ths of a thousandth of an inch on all sides of mine, so I think that is fairly flat! I then load this surface with a special double-sided tape that has a quick release on one side. This has been made using computers so it’s consistent in thickness. An abrasive is then applied to the adhesive - again produced with the aid of computers - and I am ready to make my first levelling pass.
The quality of the light in the workshop is critical, too. Firstly I have natural daylight and then I have 3 daylight/fluorescent tubes. Two are on the ceiling, set at 90 degree angles to each other and the other one is set on chains from the ceiling above the bench so that I can raise or lower it to any height. This is very useful for the occasional times when the nut slots needs to be adjusted, giving extra light at close quarters.
When routing, I put the light at a 45 degree angle and find that it reduces the shadow on the bench and doesn't obscure the cutter. Finally, I use a circuit breaker to protect against electrocution!
I have said before that the most important thing about working on other peoples guitars is giving them due care.
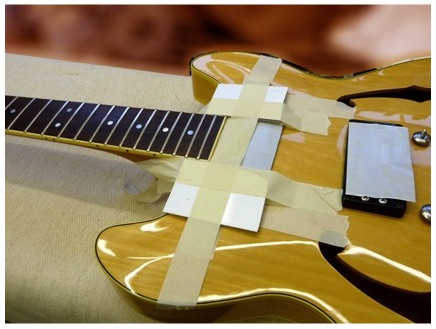
Here we see that the scratch plate or pick guard has been removed and both the pickups wound down to a low position. Then masking tape is applied and the area either side has plastic sheet fitted for added protection.
Only now can the guitar be worked on, knowing that there is adequate protection.The other important point is that this is no ordinary masking tape. Low tack is best as it doesn't affect the lacquer like some DIY tape. Its also important to remove the tape ASAP after the work is done because if left overnight it could burn into the lacquer!

To start with, there is the issue of preparation before the Set-up process can begin.

This takes you to the Fret Dressing Stage